Whether you host in-house or with a managed Windows hosting provider, if you self-administer a web server it is good to know that by default IIS7 sets application pools to “time-out” after 20 minutes of inactivity. So if you don’t have a visitor to your site within 20 minutes the application pool will shut down – freeing up those system resources. Then the next time a request comes into the site IIS7 will automatically restart the application pool and serve up the requested pages.
This is a great way to preserve resources since every running application pool does place a certain amount of overhead on the system. But, it also means that the first request – the one that causes the application pool to restart – is very slow. It is slow because the process literally needs to start, then load the required assemblies (like .NET) then load the requested pages. Depending on the size and complexity of your application, this might just be a couple of seconds or it might take 30+ seconds (during which time a user would likely give up and move on to a different site).
If you want to extend the length of the time-out setting, just change it from the default of 20 to however many minutes you want. You can also adjust the setting to 0 (zero) which effectively disables the timeout so that the application pool will never shut down due to being idle.
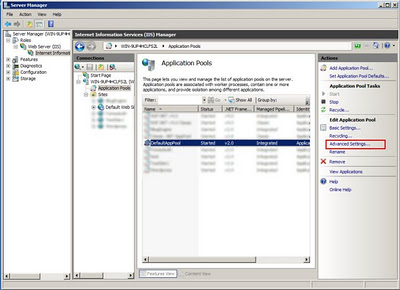
To make this change, open Server Manager; Expand the Roles node; Expand the Web Server (IIS) node. Then click on the Web Server (IIS) node; Expand the node with your local server name; and click on the Application Pools icon. You’ll then see a list of the application pools that are defined on your server. In the right-hand pane you’ll see an option for Advanced Settings – click that.
Once you see the Advanced Settings dialog box just look for the Idle Time-out (minutes) property; click where the default “20” is, and change it to whatever value you prefer.
This is just one of many settings that can impact the performance, uptime, and functioning of your web site. If you don’t have the time or interest in learning and maintaining the various settings for a secure high-performing web server, you might want to consider a fully managed windows hosting solution and let a trained and experienced administrator take care of the work for you.


